
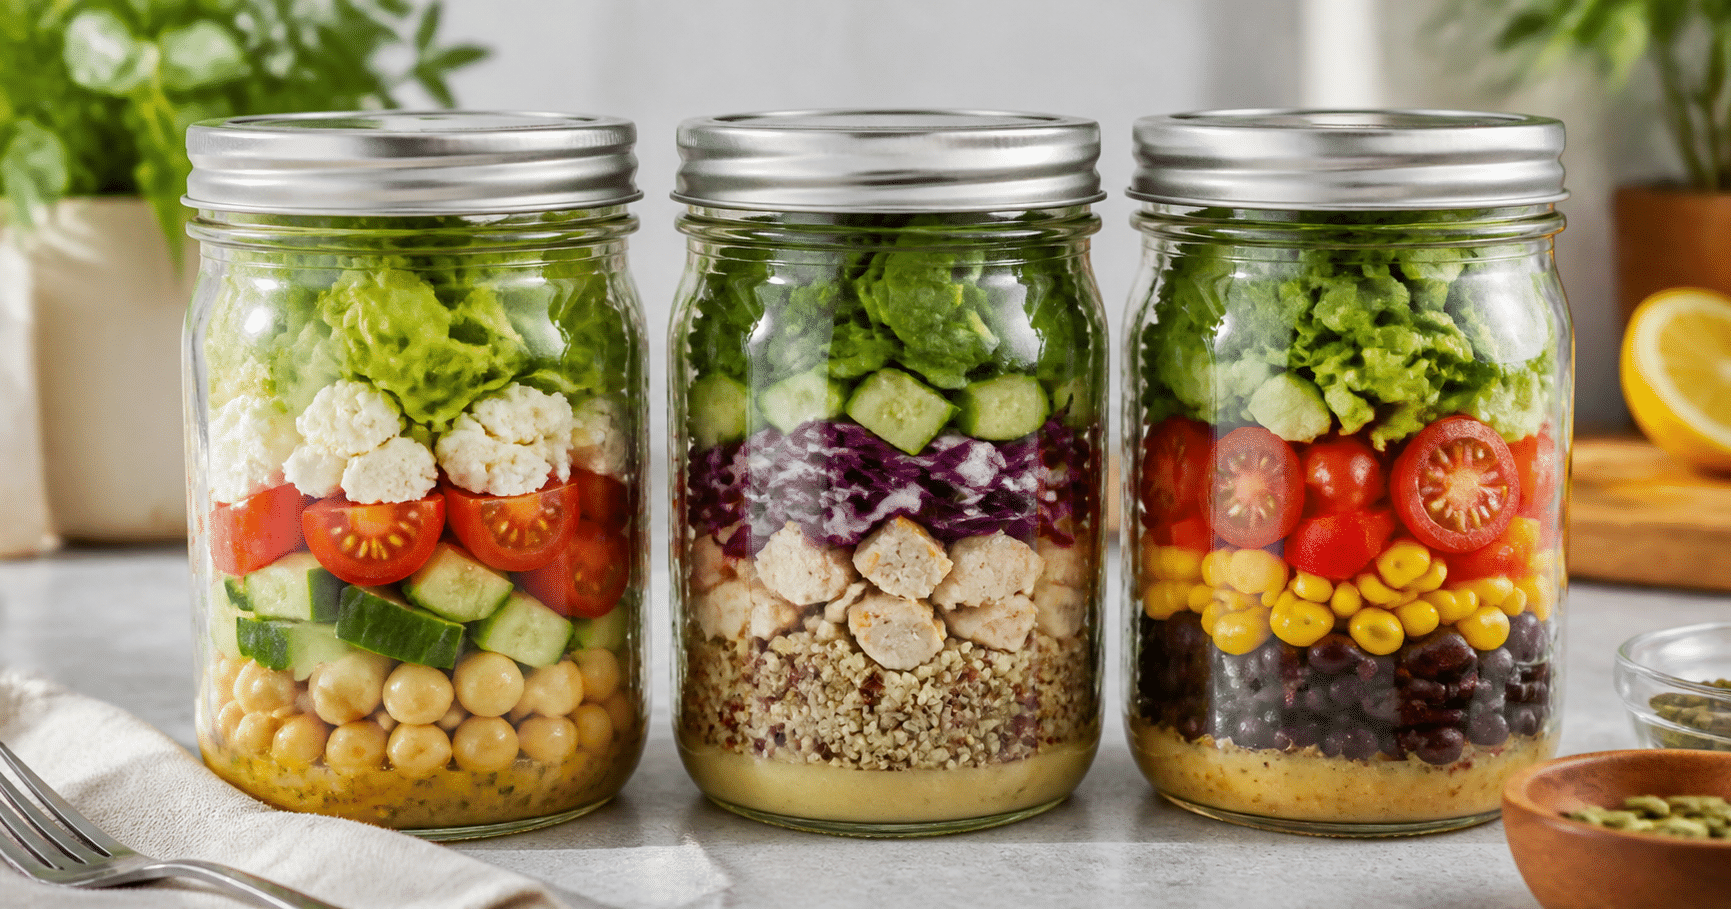
A mason jar lunch can be colorful, filling, and ready to eat straight from the fridge. The trick is not a special recipe; it’s arranging the ingredients so delicate greens stay crisp and the dressing doesn’t turn everything soggy before noon.
These lunches work well for errands, office days, or a picnic—provided you can keep them cold. A glass jar is sturdy on the counter, but it is not insulated, and perishable ingredients such as chicken, cheese, cooked grains, and cut vegetables need safe cold storage.
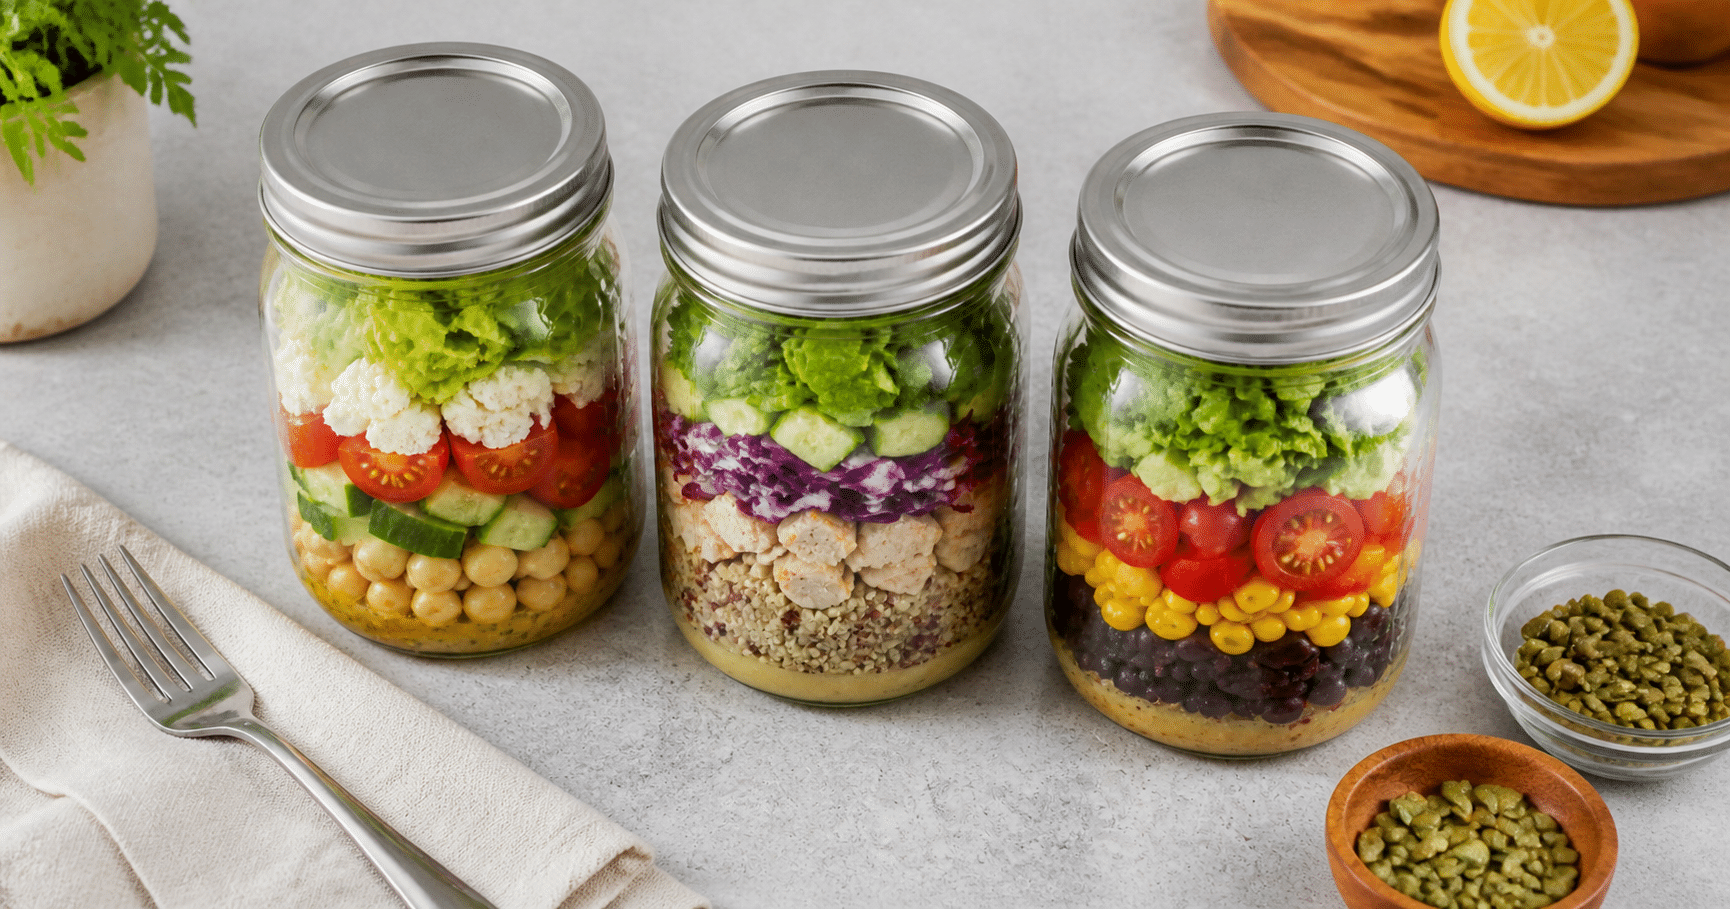
Below, you’ll find a simple layering guide and three easy combinations: a chickpea Greek salad, a chicken-and-quinoa lunch, and a bean-and-corn jar. Each can be eaten cold, with no microwave required.
Why Mason Jar Layering Makes Lunch Easier
In a well-packed jar, dressing goes on the bottom, followed by sturdy ingredients that can handle a little contact with it. Greens and other delicate toppings go near the top. When lunchtime comes, shake the sealed jar or pour it into a bowl to distribute the dressing.
Wide-mouth jars are easiest to fill and eat from. A 24- to 32-ounce jar gives you room for a generous lunch; a smaller jar may suit a lighter meal or side salad. Use clean jars with intact lids, and let cooked ingredients cool in the refrigerator before assembling. Putting warm food straight into a sealed jar can trap heat and warm nearby ingredients.
Three Small Details That Keep Jar Lunches Fresh
1. Keep the dressing away from tender greens
Oil-and-vinegar dressings and other sauces can soften lettuce and herbs over time. Put dressing at the bottom, then add firm ingredients such as beans, cucumber, or bell pepper. If you’re packing a creamy dressing, keep it in a separate small container until lunch.
2. Choose ingredients for their texture
Cherry tomatoes, shredded carrots, cabbage, chickpeas, and cooked grains usually hold up better than sliced avocado or delicate greens. Add avocado just before eating, or pack it separately. If you want crunch, keep nuts, seeds, or croutons in a little bag and sprinkle them on at the end.
3. Make cold storage part of the plan
Pack the jar in an insulated lunch bag with a frozen cold source, and refrigerate it when you arrive if possible. Keep perishable food at 40°F or colder. As a general rule, don’t leave it unrefrigerated for more than two hours—or more than one hour if the temperature is above 90°F. A mason jar itself does not keep food cold.
Three Easy Mason Jar Lunches to Eat Cold
Each combination makes one substantial lunch in a 24- to 32-ounce wide-mouth jar. Adjust the amounts to fit your jar, but leave a little room at the top so you can shake or stir the contents.
Greek Chickpea and Cucumber Jar
This plant-based lunch pairs creamy chickpeas with crisp vegetables and tangy feta. Pack pita separately if you’d like something to eat alongside it.
-
- 2 tablespoons red wine vinegar
-
- 1 tablespoon olive oil
-
- 1 teaspoon dried oregano
-
- 1 cup rinsed and drained chickpeas
-
- ½ cup diced cucumber
-
- ½ cup halved cherry tomatoes
-
- 2 tablespoons crumbled feta
-
- 1½ cups chopped romaine or baby spinach
Chicken, Quinoa, and Crunchy Greens
Cooked chicken and quinoa make this jar more substantial, while cabbage stays crisp beneath the greens. Use leftover chicken that has been promptly refrigerated, or cook a batch ahead and chill it before assembling.
-
- 2 tablespoons lemon juice
-
- 1 tablespoon olive oil
-
- ½ cup cooked quinoa, chilled
-
- ¾ cup cooked, chopped chicken, chilled
-
- ½ cup shredded red cabbage
-
- ½ cup diced cucumber
-
- 1½ cups baby spinach
-
- 1 tablespoon pumpkin seeds, packed separately
Black Bean, Corn, and Pepper Jar
Lime, cumin, beans, and corn create a bright, savory lunch. Add diced avocado at serving time rather than packing it in the jar if you want it to keep its color and texture.
-
- 2 tablespoons lime juice
-
- 1 tablespoon olive oil
-
- ¼ teaspoon ground cumin
-
- ¾ cup rinsed and drained black beans
-
- ½ cup corn, thawed if frozen
-
- ½ cup diced red bell pepper
-
- ½ cup halved cherry tomatoes
-
- 1½ cups chopped romaine
Step-by-Step Instructions
-
- Wash your hands and start with a clean, dry, wide-mouth jar. Make sure any cooked ingredients, including grains and chicken, are chilled before packing.
-
- Pour the dressing into the bottom of the jar. For the Greek version, stir the oregano into the vinegar and oil first. For the other jars, combine the dressing ingredients in a small bowl before adding them.
-
- Add sturdy ingredients next: beans, quinoa, chicken, corn, or cabbage. Keep tender greens and spinach near the top, away from the dressing.
-
- Close the lid and refrigerate promptly. Keep the jar cold in an insulated lunch bag with a frozen cold source when taking it on the go.
-
- At lunchtime, shake the sealed jar well, or tip everything into a bowl and toss. Add the pumpkin seeds or avocado, if using, just before eating.
Make-Ahead Notes for a Better Lunch
For the freshest texture, assemble jars a day or two ahead rather than trying to prepare a full week at once. Keep ingredients refrigerated, and use cooked leftovers within three to four days. If you’re prepping several lunches, store dressing and greens separately until you’re ready to pack them.
Glass jars are reusable, but they can be heavy and may break in a crowded bag. A plastic food container works just as well for the same layering method. Whatever container you choose, leave it chilled until it’s time to go.
A Simple Lunch, Ready When You Are
The best no-reheat jar lunch is built around a few sturdy ingredients, a dressing that stays at the bottom, and greens added last. Pick a combination you enjoy, pack it cold, and keep it cold until lunch.
Think of the jar as a convenient container—not a refrigerator. That small distinction helps keep a make-ahead lunch both appealing and safely packed.